Jewely Knowledge Base
Tutorial: Entering a product into stock on the Jewely ERP
1️⃣ Select the product type
- Go to the section Entering stock.
- Choose the type of product to register: Nine Or Used (if the point of sale offers second-hand products).
- Click on Following to move on to the next step.
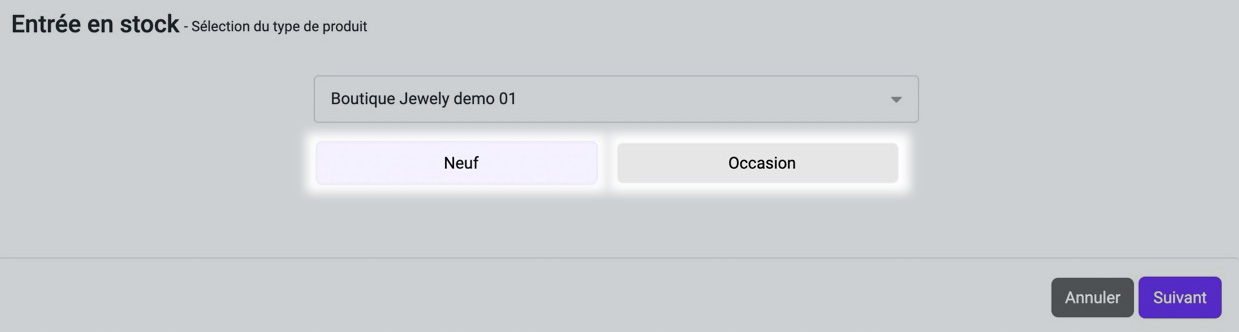
Select the product type
2️⃣ Select the point of sale
- Choose the point of sale where you want to add the product (only if you have multiple stores).
- Validate with Following.
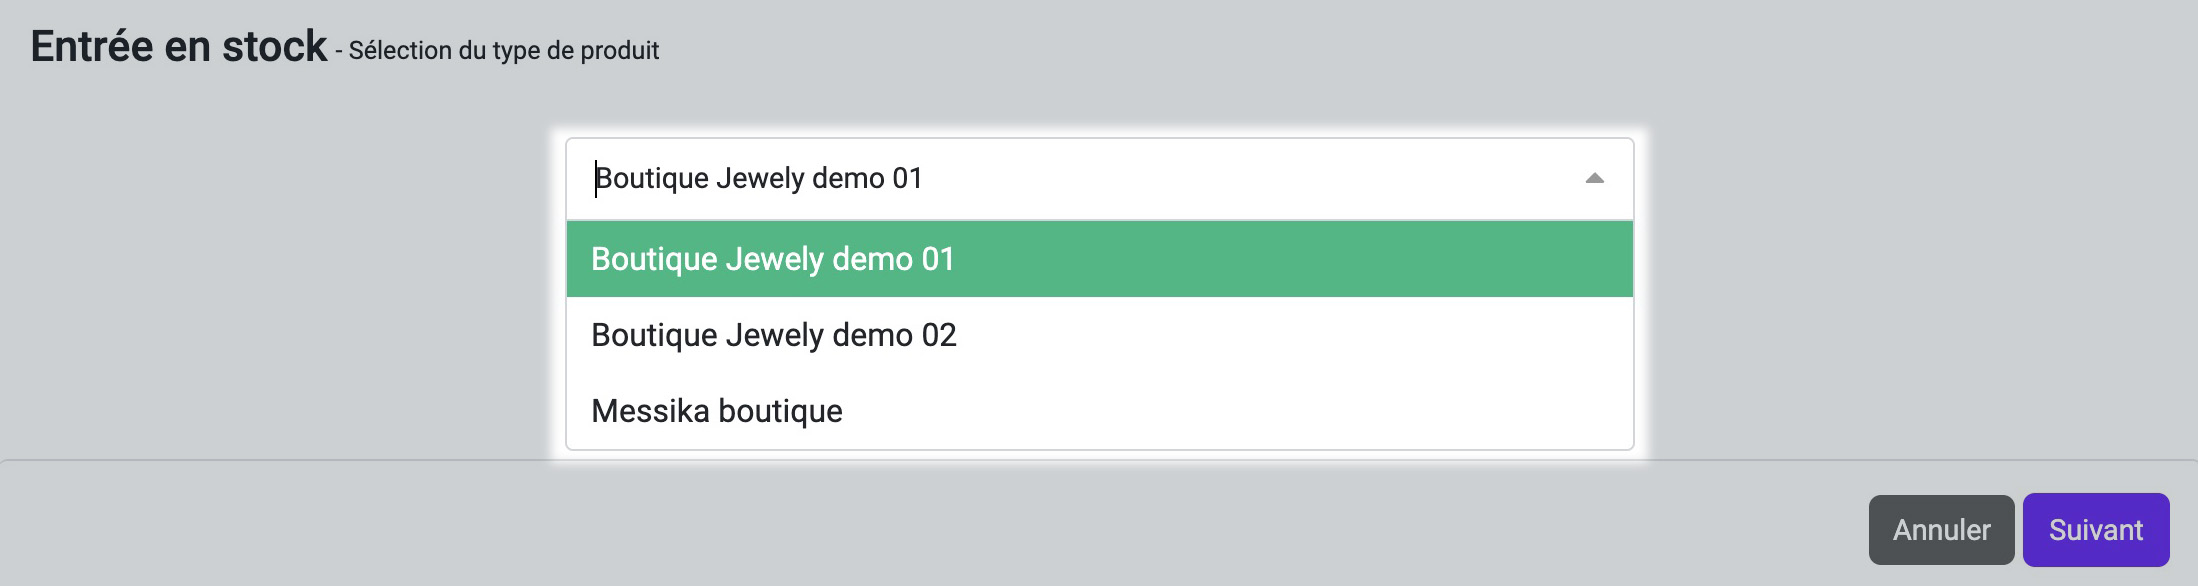
Select the point of sale
3️⃣ Indicate the supplier
- Select the name of the Brand of the product you wish to put into stock.
- The name of the associated supplier is automatically selected (if there is only one supplier for this brand).
- Choose the corresponding supplier (if there are several suppliers for this brand).
- Click on Following.
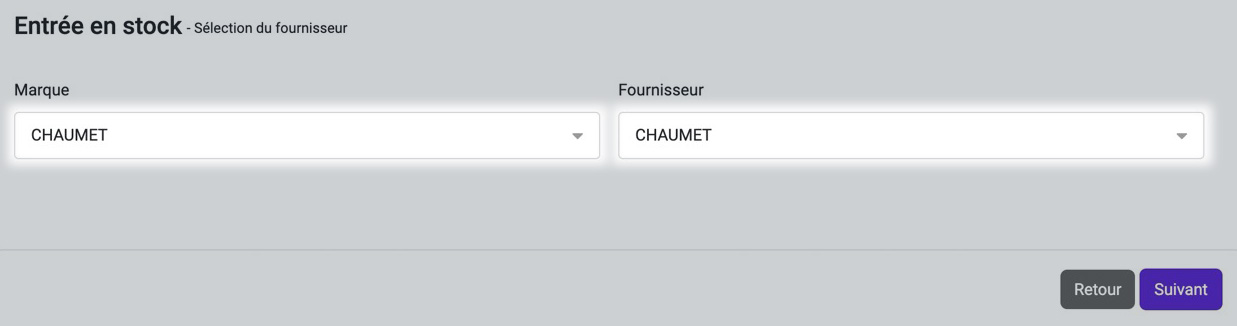
Indicate the supplier
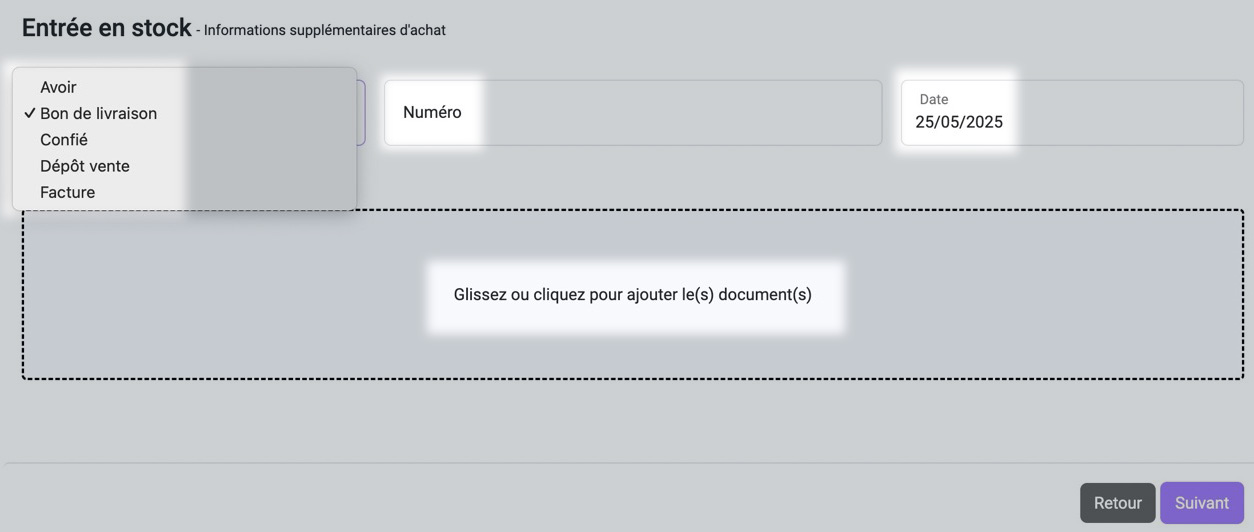
4️⃣ Add purchase information
- Select the transaction document type (Credit note, Delivery note, Entrusted, Consignment, Invoice).
- Enter the purchase document number and date.
- Add the necessary documents by dragging or clicking to import them.
- Click on Following.

Add purchase information
5️⃣ Check and complete the product details
- Check the summary of your transaction document.
- Complete the product information: Family, Category, Reference, Model, Purchase price excluding VAT, Coefficient, Sale price including VAT.
- Add information: metal type.
- If necessary enter the gemstones, number of stones, carats, colors, clarity, shape.
- Indicate the quantity of products to be placed in stock.
- Enter the number of labels to print for each product.
- Finalize the entry with Finalize the entry into stock.
Check and complete the product details
6️⃣ Edit product information via the Product Item Manager
- Change the images if necessary (replace existing web images).
- Update the product name and collection.
- Reword short and long descriptions if necessary.
- Validate the changes.
7️⃣ Generate and print the labels
- Check the number of labels to print.
- Generate them via Generate the labels.
- Download and print them to finalize the entry into stock.
Generate and print labels